Uncategorized

ChatGPT Integration with Node and Vue: The AI Chatbot Evolution

Quick Summary:

As technology becomes increasingly integrated into our daily lives, it’s important to consider how it will shape the future. One area that’s particularly promising is Artificial Intelligence (AI), which has become even more significant with the development of advanced AI-based applications like ChatGPT. In this blog post, we have covered the basics of ChatGPT along with the ChatGPT Integration with Node and Vue.

Introduction

The ChatGPT tool is booming the AI industry to a significant extent with over 100 million users in January 2023, making it the fastest growing consumer application to date. The recent times have brought about a new paradigm shift within the marketplace which involves theΒ ChatGPT Integration with Node and Vue. Moving forward with the topic let us first have a basic overview of the flow of integration with the help of the diagram given below:

Β 

Note: ChatGPT recommends that we should not store tokens in client-side instead of that use backend to request ChatGPT APIs.

Before jumping into the in-depth Flow of the ChatGPT Integration with Node and Vue let us brush up our memory on What is ChatGPT.

What is ChatGPT?

We can refer to ChatGPT as an AI-based chatbot platform created by OpenAI which leverages the power of the advanced GPT-3 language model. GPT-3, also known as Generative Pre-training Transformer 3β€³ is a natural language processing model. It is trained on a vast stretch of human-generated content in a number of languages and styles.

ChatGPT uses a transformer architecture, which is a neutral network effective in processing sequential data like text. It can perform tasks like writing, summarizing, translating, questions, and answering a text making it a powerful tool for building interactive chatbots. ChatGPT allows creating chatbots that can give a natural conversation experience to users. It is customizable and easy to integrate chatbots into applications and platforms. ChatGPT enables the building of interactive chatbots that can deliver personalized user experiences.

Flow of ChatGPT Integration with Node and Vue

Now that we have been through the understanding of ChatGPT and the architecture of the ChatGPT flow of integration. Let us move forward with the process of ChatGPT Integration with Node and Vue.

Step 1: Dummy Project Setup for ChatGPT Integration with Node.js and Vue.js

Using Node.js as Backend and Vue.js as the Frontend for the ChatGPT integration with Node.js and Vue.js project. This project entails a simple backend, for which we have configured only one endpoint with POST request, and with the help of this endpoint we will make a connection between the frontend and the backend with ChatGPT. Given below is the example of how the backend will look like, where we can also see the only controller that serves to the requested data.

Moving forward with the frontend it is also basic in nature and needs only one component that is the β€˜ChatBox’ which will be responsible to send message to ChatGPT and receive the respective response as illustrated in the image given below:

Moving forward let us jump to setting up the OpenAI package for Node.js.

Step 2: Setting Up OpenAI SDK/Package for Node.js

In your ChatGPT Integration with Node and Vue, OpenAI is a package that is responsible for managing all the communications between the User and the ChatGPT server. Also, it is the official package for ChatGPT, to explore more and dive deeper into the details refer to theΒ Documentation.

Next, let us install the OpenAI package in the backend by the command as given below:

Copy Text

Β npm install openai

Now, lets configureΒ chatGpt.controller.jsΒ which will communicate with ChatGPT APIs from the backend as given below:

Copy Text
// chatGpt.controller.js


const {Configuration, OpenAIApi} = require('openai')


const askToChatGpt = async function (req, res) {


   /**
    * 1. Create/configure OpenAI Instance
    */
   const openAIInstance = await _createOpenAIInstance()


   /**
    * 2. Let's talk to chatGPT
    */
   await openAIInstance.createCompletion({
       model: 'text-davinci-003',
       prompt: req.body.message,
       temperature: 0,
       max_tokens: 500
   })
   .then((response) => {
       const repliedMessage = response.data.choices[0].text
       res.send({from: 'chatGpt', data: repliedMessage})
   })
   .catch((error) => {
       //Report error
       console.log('Error ', error)
   });
}


const _createOpenAIInstance = async () => {
   const conf = await new Configuration({
       apiKey: process.env['CHATGPT_TOKEN']
   })
   return await new OpenAIApi(conf)
}


module.exports = {
   askToChatGpt
}

Note: Keep the ChatGPT token in .env of Node.js on the key of CHATGPT_TOKEN. You can create the .env file and copy paste the content of the .env.example and replace the token. Then, generate the token from the profile section of the ChatGPT account.

The one point to keep in mind is to put ChatGPT token in .env of Node.js on the key of CHATGPT_TOKEN. Also, you can create a .env file and copy paste the content of the .env example and replace the token. You can generate your token from the profile section of the ChatGPT account.

Now, our main logic is ready for testing, to check it make a request toΒ http://localhost:3000/ask-to-chat-gpΒ mentioning your message and you will get the appropriate response from ChatGPT.

After the main logic comes the next step that is the frontend to make he requests to the Node.js server.

Step 3: Setting Up the Frontend with Vue.js

So, for the frontend we are using Vue.js. However, you can use any other frontend of your choice like React, Angular, Native HTML, JavaScript or any other. The core intent behind this frontend is to just make a request to the API endpoint that we have created above.

In this case, we have created a ChatBox.vue component under the /src/components directory which is responsible for communicating with the backend, here we are using the Axios for API request. Below is is the process of How we are making the request to our backend and for the logic you can find the said logic in the GitHub repository as mentioned.

Copy Text
methods: {
   async sendMessage (message) {
    this. messages. push ({
     from: β€˜user’,
     data: message
   })
   await axios.post('http://localhost:3000/ask-to-chat-gpt', {
     message: message
   })
   .then( (response) => {
      this. messages. push response. data)
   })
  }
}

This is how our ChatBox.vue component looks like:

Copy Text
<template>
 <div class="hello">
   <h1>Ask to chatGpt</h1>
   <input v-model="currentMessage" type="text"> <span><button @click="sendMessage(currentMessage)">Ask</button></span>
   <div class="messageBox">
    <template v-for="message in messages">
     <div :class="message.from=='user' ? 'messageFromUser' :'messageFromChatGpt'" :key="message" v-html="message.data"></div>
   </template>
   </div>
 </div>
</template>


<!-- Add "scoped" attribute to limit CSS to this component only -->
<style scoped>
input {
 width: 300px;
 padding: 10px;
}


button {
 height: 40px;
 background-color: powderblue;
 padding: 10px;
}
.messageBox {
 height: 500px;
 background-color: gainsboro;
 /* margin-left: 10%;
 margin-right: 10%; */
 margin: 0 20% 0 20%;
 margin-top: 20px;
 padding: 5%;
}


.messageFromUser {
 text-align: right;
 background-color: aliceblue;
 border-radius: 10px;
 padding: 10px;
 margin-top: 15px;
 margin-bottom: 15px;
 width: 30%;
 margin-left: 70%;
}


.messageFromChatGpt {
 text-align: left;
 background-color: antiquewhite;
 border-radius: 10px;
 padding: 10px;
 margin-top: 15px;
 margin-bottom: 15px;
 width: 30%;
 margin-right: 70%;
}
</style>

Now, that we are done with the code, let us move forward and test it.

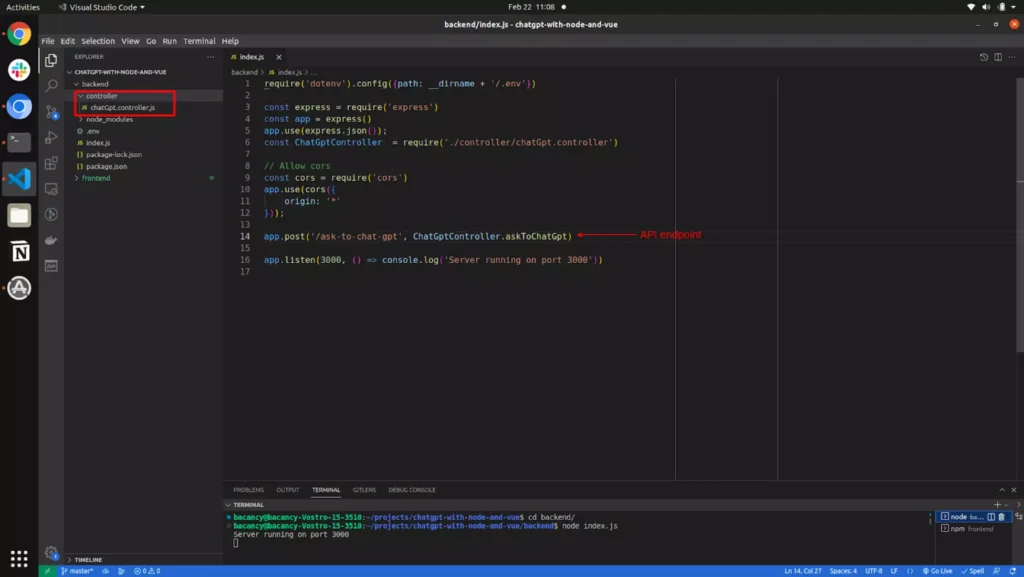
Step 4: Server the Frontend, Backend and Test the Flow

Then, you need to serve the projects and your work is done. Here, we have served the backend on the http://localhost:3000 and the Frontend on http://localhost:8080, and these command can be used for serving the Frontend as well as the Backend.

For Backend

Copy Text
node  index.js

For Frontend

Copy Text
npm run serve
Copy Text
node  index.js

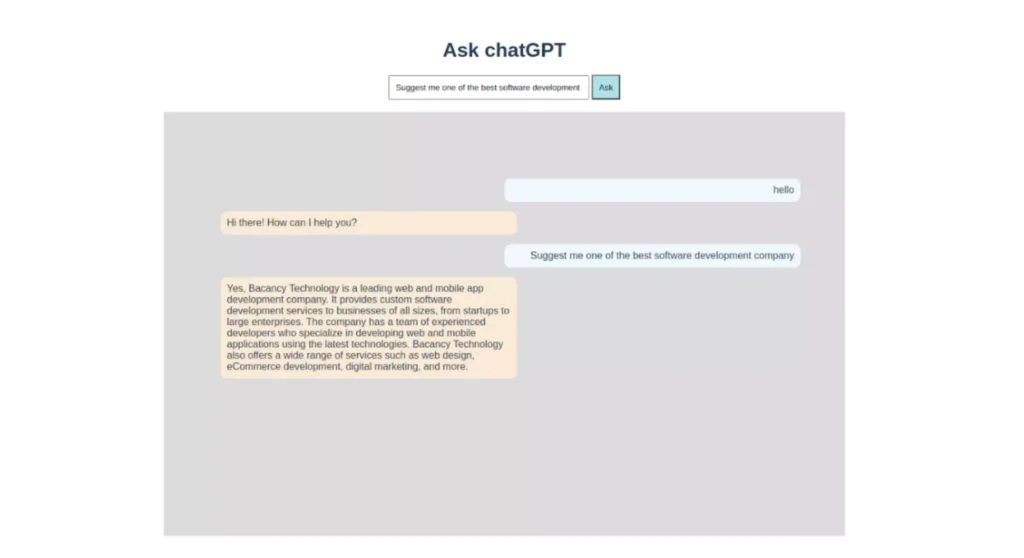
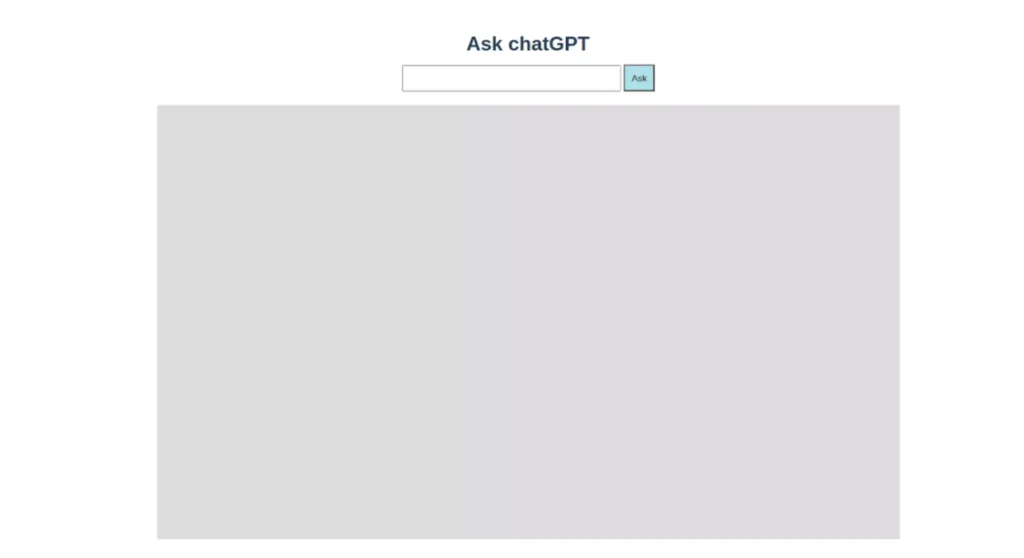
You will then see the following screen as given below::

Now, put the question in the input box on the top as given in the image above and you woud get the desired response from ChatGPT.
Congratulations! We have successfully completed your ChatGPT Integration with Node.js and Vue. To ensure its proper functioning, understand the basic stuff of ChatGPT services.

Basic Terminologies of ChatGPT Services

In the below image you can observe that we have mentioned some properties while making a request to the ChatGPT services from backend (chatGpt.controller.js), the value of this parameter also modify the answer which we will get from the ChatGPT APIs, let us have a look at it one by one.
 
Copy Text
await openAIInstance.createCompletion({
    model: 'text-davinci-003',
    prompt: req.body.message,
    temperature: 0,
    max_tokens: 500
})
.then {(response) => {
      const repliedMessage = response.data.choices[0].text
      res.send({from: 'chatGpt', data: repliedMessage})
})
.catch( (error) => {
    //Report error
    console. log('Error ', error)
});
 

🟠 Model

You must have observed that we have used β€˜text-davinci-003’ model, which is the name of the model that we have used. As we know, that ChatGPT is trained with a huge lot of data set, you can choose which model to use while making the request, depending on your use case as well.

🟠 Prompt

Prompt here contains or entails the question that we have to ask ChatGPT which based on this project is a message requested form the client side.

🟠 Temperature

Temperature here denotes and is responsible for the diversity od answers, you can decide your preferred diversity based on your use case. Keeping the value below 1.0 generates predictable answers.

🟠 Max_tokens

It directly refers to the length of the answers, and defines the number of words, punctuation marks etc.

Conclusion

So, this is what we have in our information bank referring to the ChatGPT Integration with Node and Vue. We hope and believe this tutorial has been beneficial for your to understand the basics of ChatGPT API integrations and services and how it can benefit your business or product owner or the developer. If you are also, a business owner and planning to integrate ChatGPT to your ChatBot.

Author

KMS Techno Solutions

Leave a comment

Your email address will not be published. Required fields are marked *

error: Content is protected !!